Blog

Tips, advice, insights & thoughts on interiors photography, portrait photography, web marketing, and SEO.

Animals & Interior Photography
Starry in her Atherton garden at the backdoor. - Arterra Landscape architecture

Starry in her Atherton garden at the backdoor. - Arterra Landscape architecture

There is a Japanese design concept / aesthetic called wabi-sabi. Loosely defined, wabi-sabi represents the acceptance of transience and the beauty of imperfection. When I approach an interiors photography shoot, I look to convey that transience into the beauty of the room design. It can be subtly conveyed in a creased pillow, an indentation in a chair, running water, an open door, or an animal wandering in or out. Adding this playfulness or spontaneity lends an intimacy and everyday realness to the images.

On some shoots we get lucky. There might be a personable and cooperative pet who keeps us company as we shoot - following us from room to room. Some are even posers, in the very best sense of the word. They act as the transience I am looking for, adding charm, humor, personality and approachability.

Louie the Frenchie in the master bedroom. - Fannie Allen Design

Louie the Frenchie in the master bedroom. - Fannie Allen Design

Adding Intimacy to Interiors

The character above is Louie. Though a senior citizen with a propensity for wandering out the front door on a moments notice, he quickly won over the whole crew at a recent shoot with designer Fannie Allen at this colorful Menlo Park residence. He patiently cooperated, turning his head this way and that for the perfect profile and mood. Of course a cookie was not too far out of range.
As you can see he adds a breezy spark to an already cheery, sophisticated room.

Adding animals, and other wabi-sabi elements, adds a sense of unpredictability and intimacy that elevates the images. Give it a try!

The family cat in the media room. - Kendall Wilkinson Design

The family cat in the media room. - Kendall Wilkinson Design

Lucy entering the kitchen from the backyard garden. - Megan Warren Interior Design

Lucy entering the kitchen from the backyard garden. - Megan Warren Interior Design


A Recent Interiors Photography Project of MacRostie Winery

My New Newsletter

I am excited to announce the launch of my newsletter. I know, I know... I have been meaning to do this for awhile. The feedback has been overwhelmingly positive.

On my photo shoots, I see many beautiful interiors and decided you might be interested in seeing them as well. There is so much design talent in the San Francisco Bay Area and I have the good fortune of working with really talented designers, photographing their work for their websites, publications, contest entries and editorial stories.

For my July 2015 issue, I featured a project shot for MacRostie Winery of their new estate house in Sonoma. The interiors are by San Francisco designer Grant K. Gibson. I am thrilled to share it with you here.

Recent Interiors Photography Project

MacRostie Winery's new estate house tasting room is surrounded by spectacular views of the vineyard.

MacRostie Winery's new estate house tasting room is surrounded by spectacular views of the vineyard.

MacRostie Winery

In late winter I photographed the amazing new estate house at MacRostie Winery. While the winery has been around since 1987, they had not had a tasting room - until now.

The estate house is 10 minutes outside of Healdsburg on Westside Road. Situated on a hill that overlooks the vineyard, there are dramatic views in every direction. We were fortunate to first arrive in the evening just after a rain, making for the most spectacular sky.

The artwork in the MacRostie Winery estate house tasting room appear almost to be additional windows.

The artwork in the MacRostie Winery estate house tasting room appear almost to be additional windows.

The Design Inspiration

The interiors are by San Francisco designer Grant K Gibson. He describes his goals, inspirations and selections: "I wanted to warm up the modern space by using soft colors like greens and pale lavenders, as well as pull in outside colors, and from the vines.  
 
For the artwork selected - I wanted to almost make them seem like windows.

Overall, my goal was to make the space feel as if you were coming into someone's private home - make the space like a living room or dining room that is inviting, warm and comfortable with layers and textures."

MacRostie Winery's estate house tasting room features high ceilings and a large expanse of windows letting in streaming sunlight.

MacRostie Winery's estate house tasting room features high ceilings and a large expanse of windows letting in streaming sunlight.

See More of This Project

To view additional images from this lovely project, visit my website at  www.macdonaldphoto.com or check out how the images were realized on the MacRostie Winery website.

Please feel free to give me a call at 1-415-640-7506 for information on how I approach a photography project and rates.

The custom-made communal table invites conversation while wine tasting and noshing.

The custom-made communal table invites conversation while wine tasting and noshing.

How to Prepare & What to Wear When Having a Professional Business Portrait Taken

These days everyone needs a great business portrait. Be it for social media profiles, your company website, speaking engagements, it is important to have a portrait that shows you at your best.

Most people are unaccustomed to having their portrait taken and have questions about how to prepare so they get the best results. The choices that you make will partially be determined by standards in your industry, what tone you wish the pictures to convey, what the setting will be, i.e. studio or outdoors, and how the portraits will be used.

Things to Consider Before Hiring a Portrait Photographer

1. How and where will the pictures be used?

2. What sort of background do I want for the pictures? - a studio setting, nature or the outdoors, an office or a home environment?

3. What tone do I want the portraits to convey?

How to Groom for Your Portrait Session
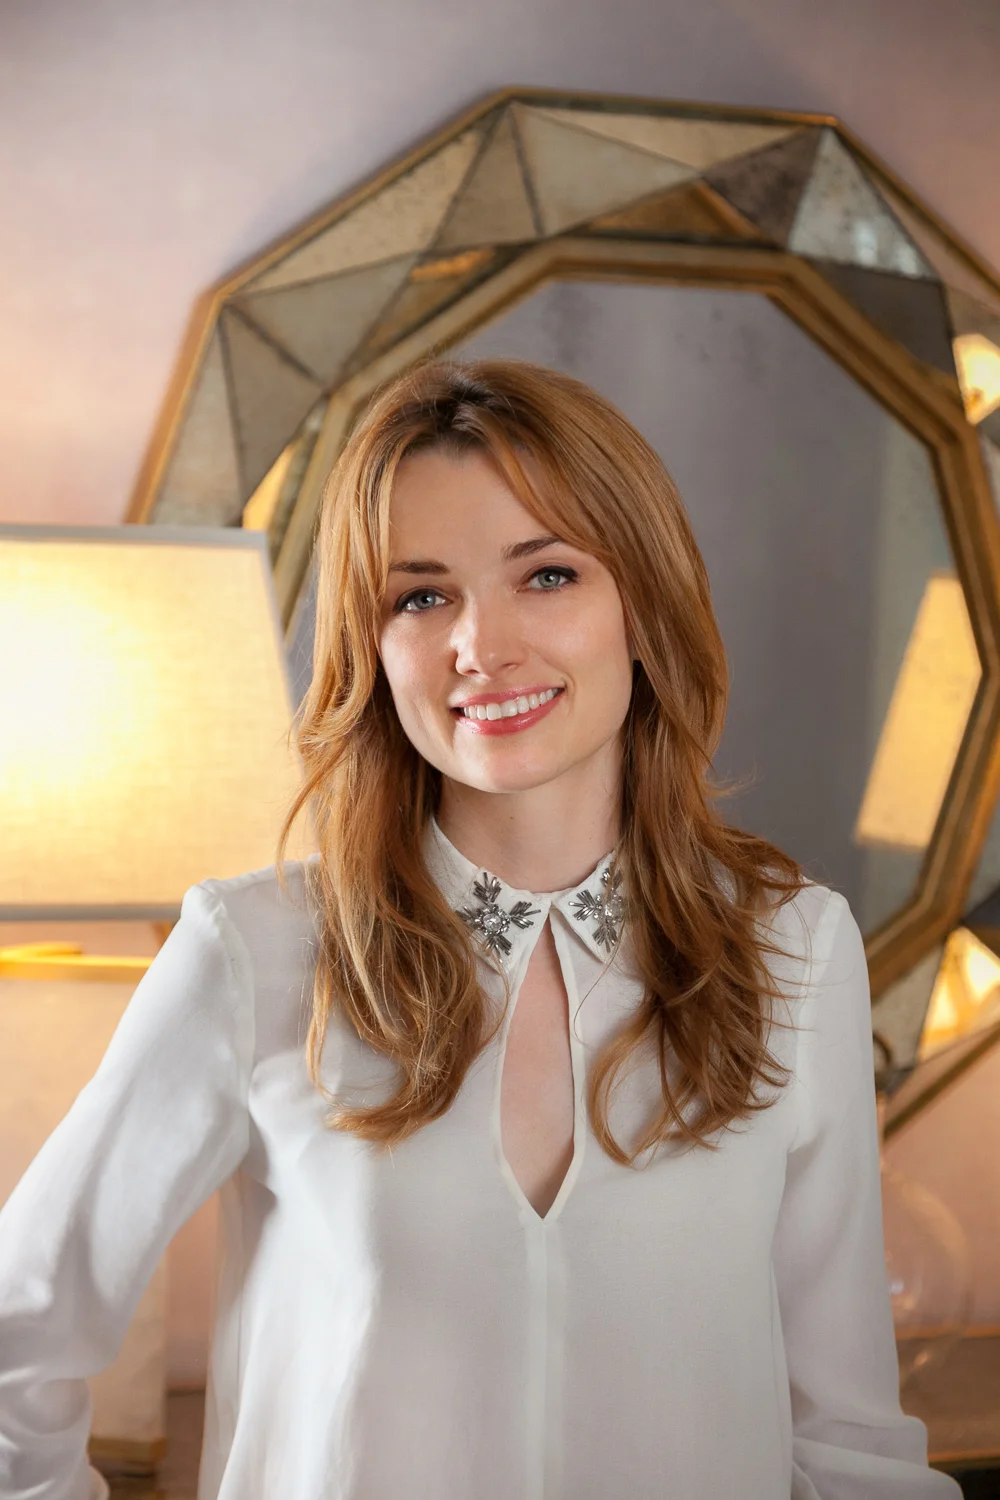
Grooming for Women

1. Hair: Plan to have your hair done the morning of, or the day before, the photo session. This can include a cut, a dye job, a wash and blow out, or all of them. Being happy with how your hair looks is a big part of being happy with the final results.

2. Make-Up: Option 1: Consider having your make-up professionally applied. Hiring a make-up stylist that comes to the photo shoot prior to your session to apply your make-up and style your hair is one way to go.  I highly recommend this option as it improves the results enormously and how happy you are with the way you look. Option 2: Another, more economical make-up option is to have your make-up done at a department store counter. Tell the stylist that you are having your portrait shot. They should know what is best. Often the make-up application is free and they hope you will buy one or more of the products. Nordstrom, Saks Fifth Avenue, Macy's and others will make appointments for this service. If you go with option 2, have your hair done before going to your make-up appointment. This way, when you walk out of the department store you can head directly to your portrait session.

Grooming for Men

1. Hair: Plan to have your hair cut the week of, or day before, or the morning of the photo session. This can include a cut, a shave or any grooming details needed. This is a good time to see if nose or ear hair are in check. Being happy with how your hair looks is a big part of being happy with the final results.

2. Make-Up: While most men don't usually wear any make-up, having a make-up stylist on the set of the photo shoot makes a huge difference in the results. The stylist will do grooming touch ups, cover any blemishes, deal with shiny skin, trim a mustache or beard and overall make you look great. You would truly be surprised how much this helps.

What to Wear for Your Business Portrait

Accessories & Eyewear

1. Eyeglasses: Decide if you want to be wearing your glasses in your portrait. If you are known for wearing them all the time then it might be a good idea to do so for your portraits as that is how people see you. Doing a combination of some with glasses and some without gives a nice variety of shots to choose from.

If you have a pair of glasses with non-reflective lens, bring them to the shoot.  Bring a selection of frames if you can.

2. Jewelry: Let your industry and what tone you want to set be the guide for what jewelry you might wear. When in doubt, keep it simple, elegant and timeless.

Clothing

1. For both men and women, choose business attire - whatever that means for your industry. This can be casual or dressier.

2. Bring at least 2 “looks”. For men bring 2-3 long sleeved business shirts, business jackets and tie options so we have a few styles and colors from which to select. For women – V-neck or scooped neckline tops work well with a jacket. Solids or very minimal / subtle patterns work best to keep the focus on your face. Bring both light and dark options. Be sure the clothing is as new as possible (not faded or over washed), or has recently been cleaned, has no frays, piling or lint visible.

The Final Results

If you follow these preparation suggestions, the quantity of image choices will be greater. You will be much happier with the outcome and will use the pictures more often and for longer. Going the extra mile to make the images their best will give you the best value for your time and money invested.

Visit my professional business portraits and headshot portfolios to get ideas for how you might approach your portrait session! I am always happy to discuss ideas on how to best approach a portrait shoot with you. Please feel free to give me a call at 415-640-7506.


How to Prep and Style for an Interiors Photo Shoot to Get the Best Results
A beautifully propped shot with just the right amount of staging by interior designer Grant K Gibson.

A beautifully propped shot with just the right amount of staging by interior designer Grant K Gibson.

I often work with interior designers, photographing their design projects for their websites, for magazine publication, and for their company marketing. Depending on where they are in their career, they may not have had a design project professionally shot so I get asked how to best prepare for a successful and productive shoot. I share here my recommendations on things to consider before and the day of an interiors shoot.

Prepping before the shoot:

1. It is best to schedule the shoot on a day when the client will not be home. Doing this allows everyone involved to focus on the project and not be distracted by client questions, children running through the set etc. It keeps everything moving and allows me to get more shots done in a day and collaborate with you on each shot.

2. Create a shot list of which rooms will be shot and how many images you hope to get of each room. Are they overview, vignettes or detail shots? What angles appeal to you? Depending on many variables, including wall colors, lighting in the room and the color temperatures, window light and more, determines how quickly we can move through the spaces. I can take anywhere from 6-12 shots in half a day and 20-30 in a full day shoot.

3. How will the rooms be styled? Think about how you want to style the rooms. I suggest you consider the following as props:  fresh flowers, plants, artwork, accessories, books, and food. You may not want the clients artwork in the shots if it is something you did not select so consider renting artwork for the shoot. Bring a variety of flowers so that there are a selection to choose from and that the flowers in the shots change from set up to set up. If you don't bring enough, it can look odd to keep moving the same arrangement from room to room. Consider cupcakes, a fun pastry or cake, stylish packaging for kitchen food items, and elegant soap, sea sponges etc. for bathroom shots.

4. Consider doing a walk through with the photographer prior to the shoot day. This will allow you to decide on the order the rooms will be shot in and allow me, as the photographer, to consider the lighting conditions, tight angles etc. It will also allow you to consider if there are heavy items that will need to be moved. This will allow you time to hire help to move these items, if necessary.

5. Property Releases - Get one signed before the shoot day! To protect your business from future liability issues I always advise my clients to be sure their clients understand that the images we are taking are for both the designers and my portfolio. In addition, the images created could be published in a magazine or elsewhere. I always reassure them that the client's name and address will not be used, unless they want them to be, so their privacy is respected. Be sure to have this important conversation with your client before the shoot.

The day of the shoot

1. Get your props to the location early. Consider dropping them off the afternoon before or getting to the shoot before I arrive and figure out where to place them so they won't interfere with the rooms we are shooting. It will be a hassle for you and your assistant to have to keep moving the items if they are in a shot and you don't want them there.

2. Work one room ahead of the photographer. Ideally, if you get to the shoot a bit early, you can style the first shot and remove any clutter or items you don't want in the shot. This allows you to start working on the next room while I am shooting the first one.

3. We all need to eat! Everything goes better when you, your assistant and the crew are not hungry so allow time to order food and stop to eat lunch.

4. Leave some of the flowers for the client. This nice gesture always builds goodwill for the inconvenience of having us there and thanks them for allowing us to shoot!

I am sure I will have other ideas to share with you in a future post as they come up. Feel free to add your suggestions in the comments section!


Explore my interiors photography portfolio to see more examples of well propped and styled interiors.